Tuesday, June 29, 2010

ARRI announces first ALEXA shipments to customers (From PVC)


Franz Kraus, Managing Director of ARRI in Munich, commented on the release to customers: “ARRI has delivered on its commitment to customers at IBC2009 – ALEXA is shipping in June, with an entry price point of EURO45.000 and with a rich feature list which today’s technology-savvy and quality-driven customers have fully embraced. With important reference productions such as Hugo Cabret and many accolades from industry innovators, ALEXA is now positioned in the market at the very highest level, offering unrivalled quality, reliability and performance at a very competitive price.”

From PvC

Click HERE for the full article

Friday, June 18, 2010

50Mbit 1080p MJPEG on the Panasonic GH1 Firmware Hack looks AMAZING.

A buddy of mine just asked me about this. . . so I had to google it.

Longshan's People Part II - 50Mbit GH1 MJPEG from Andrew Reid on Vimeo.


Here's what I found.

Now you can adjust the AVCHD bitrate on your GH1….up to 32Mbit !!!

From Engadget
The Panasonic GH1 can do some great video for its size, thanks to that fancy micro four-thirds optical setup, but it's been held back the low bitrates it uses when recording. Now some enterprising hacker named "Tester 13" has reversed engineered the GH1's firmware and unlocked the true power of the camera (much like Magic Lantern has done for the 5D Mark II). In fact, the main trouble now is that Tester 13's firmware uncovers too many options: users are trying out different configurations to maximize quality without bumping into the camera's buffer limitations. The current flavors of choice include 50Mbps MJPEG at 1080p (the stock camera caps out at 720p in MJPEG), to be augmented by 32Mbps AVCHD when the crazy high-end MJPEG causes the camera to buffer overflow. It's all very technical and video-nerds-only in theory, but results speak for themselves: check out a sample video after the break. And try out the new firmware if you dare.


Buffer Size Issues? OBVIOUSLY.

For a more technical explanation, click HERE(The EOSHD Community Site)

Summary, what is means for the none-techno-geek (From The EOSHD Community Site)

>Hugely better image quality. 50MBit MJPEG shows zero compression artefacts, zero mud and much more photo-like gradients, tones and textures

>It's better looking than the 5D Mark II's H.264 and less compressed

>MPEG 50Mbit shows low noise and the noise is of a finer grain, more film-like

>The workflow improvements are immeasurable. The 50Mbit MJPEG, this can be edited directly, no transcoding required. As for AVCHD, thanks to Tester13 the native 24p can go straight into Log & Transfer without pulldown or deinterlacing work.
Before I was waiting around 6 or 7 hours per project for Voltaic to transcode and deinterlace the GH1's AVCHD to ProRes. Now the same amount of footage can be done in one step in Final Cut Pro Log & Transfer and takes 30 minutes.

>Non-native 24p 32Mbit AVCHD (60i) can be played back in-camera. Focus assist works in both AVCHD and MJPEG mode. It's expected playback of native 24p AVCHD can be fixed in the near future once a patch is released by Abed.

>A JPEG is saved containing shot EXIF info, shutter speed, ISO, etc.
The image is smoother looking and better scaled from the 12MP CMOS compared to the 5D Mark II which has 22MP to deal with. Pixel binning is in action, not line skipping.


50Mbit 1080p MJPEG on the Panasonic GH1

AND, Finally, THE HOW-TO(s):
Beginners GH1 Custom Firmware Guide

Original DVX User Post


Let me know what you guys think!!

FREE CF Card Data Recovery in OS X!!


PHOTOREC is AWESOME.

Here's a How-To post from the Faceman Photography blog (your mileage may vary):

Here are the simple steps to running this under Mac OS X (FWIW, photos on the card were shot in Canon RAW and camera's CF card was mounted via a card reader under Mac OS X 10.4.9):

(1) Download PhotoRec v6.6 here. Don't worry that it's also a download for an app called TestDisk, which I haven't played with (yet).

(2) Uncompress the file testdisk-6.6.darwin.tar.bz2

(3) Inside the folder that results, you will find a folder called "darwin" that contains the UNIX executable called (unsurprisingly) "photorec".

(4) Double-click photorec to launch it into the terminal and here's what you'll see:

(5) Select the volume that represents your memory card and hit return to Proceed. In this case, /dev/disk1, is what we want.

(6) At the next screen, which looks like this:


select the partition table, which should be fine at the default setting of "Apple partition map" and hit return to get to this screen:


(7) "Search" will be highlighted. Hit return to start file recovery and you'll see this:


(8) "Other" should be highlighted and should work just fine (or at least it does for me with my setup). This will take you to the last step where you select what directory to recover to, in which case the default folder should be fine. Just select "Y" at this screen:


It will then start processing your memory card and saving what it finds to a folder called "recup_dir.1"

(9) Sit back or go make a sandwich and come back to a folder full of recovered files (hopefully)...


So, there it is. . . Your mileage may vary, but this is DEFINITELY handy to have for anyone who shoots with HDSLR's, or RED CF Cards. . .

Sunday, June 6, 2010

What's a DIT?


A digital imaging technician (DIT) works in collaboration with a cinematographer on work flow, systemization, signal integrity and image manipulation, to achieve the highest image quality and creative goals of cinematography in the digital realm.[1]

A DIT's role is especially prevalent with the widespread use of HD technology, in assisting cinematographers normally used to film stock in achieving their desired look. They may also be in charge of transferring and managing the image data, replacing the traditional film loader position.

From Wikipedia


The role of a DIT (Digital Imaging Technician):

When you rent a RED One camera through Superkrush, you will have the option to hire a DIT, a RED expert to ensure your shoot will run smoothly and you get the most out of your RED One camera hire. Our on-set DIT is highly trained so your camera is set up correctly and your data is captured and backed-up securely, so that your post-production runs smoothly too.

From SUPERKRUSH

I personally like the term "DMT" (Data Management Technician) over DIT, but they are essentially the same thing.

Here's a cool post from REDUSER about the gear that most RED DIT's use.

New Online Learning Resource: DigitalCinemaLessons.com

I'm not really sure how I missed this, but here it is!

From REDUSER
Hey everyone. We at BLING Digital are very excited to make the official announcement here on reduser that www.digitalcinemalessons.com has launched, and is now live.

The site is an ever growing database of video lessons on all things digital, with a heavy emphasis on RED. We have put together a group of Red all-stars as the instructors. In no particular order, you will now be able to learn from:

1. Brook Willard. Possibly the busiest on set RED tech in the world.

2. Michael Cioni. Given more RED workflow lectures than anyone.

3. Steve Sherrick. The man who puts together the AMAZING reduser events at NAB that we all love so much, and a great Red Tech.

4. Kaku Ito. A RED Rocket™™™™™™ pioneer. Our first international instructor, he will be teaching in Japanese.

5. Mark L. Pederson. Who the hell is he? If you don’t know the founder of Offhollywood, get out from under that rock! Owns RED #6 and #7 (or 1 and 2 if you don’t count Jim’s).

6. Jeff Kilgroe. Hardware guru. Over 7,000 posts on Reduser.net.

7. Blair Paulson. The man who brought the Road Grader to SoCal, and owner of RED #19.

8. Jesse Korosi. A Bling Digital wizard who you don’t know.....yet.

9. Steve Gibby. Will teach you how to travel lean and mean.....with a RED. Owns RED #8 and two other very early REDs.

10. Obin Olson. Nobody knows ADOBE workflow like this guy does.

11. Jason Diamond. AVID workflow master. Red-to-AVID-to-RED.

12. Chris Parker (me). Worked the 57-RED-Camera NIKE shoot.

Our goal is simple. To expand the worldwide knowledge base for Digital Cinema Workflow. For starters, think of it as an online video manual for all things RED.


HERE'S a link to the thread on REDUSER, and HERE is a Link to DigitalCinemaLessons.com (the website in question).


ENJOY!!!

Saturday, June 5, 2010

Red One Online& On-Set Procedure (For NYFA Cinematography Students)

 Red One Post Intro Packet (Onset Procedure & Online Edit) 06.06.10


OVERVIEW:
The purpose of this packet is to acquaint you with the tools that you will be using in conjunction with the RED ONE Digital Cinema Camera for Post-Production. THESE ARE NOT THE ONLY TOOLS AVAILABLE.  There are many paths to Red One Post;  these are the ones we find the easiest and most reliable for student productions.  Your Mileage May Vary.

For further support, you can refer to http://www.reduser.net


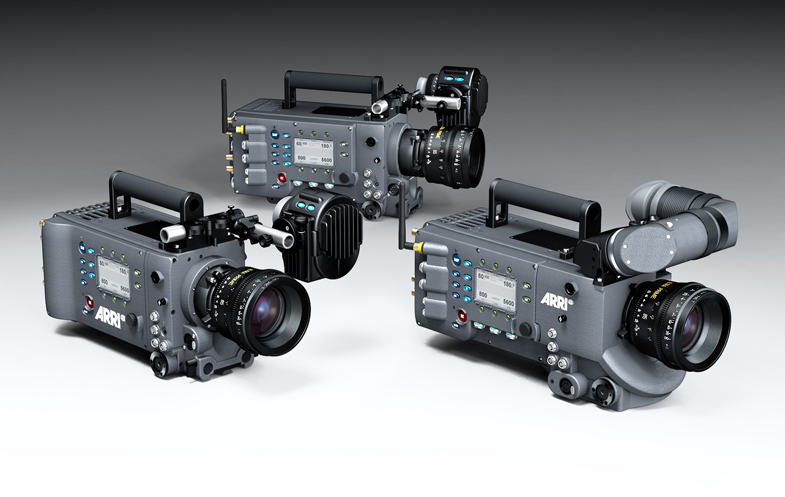
The RED One is a Film Camera with a digital back.  The Imaging Sensor is The Film Plane, De-Bayering is the Chemical Bath, Color Science (LUT/Colorspace) is the Lab Timing, and Transcode is the Telecine.  Your R3D files are a Digital Negative.  Treat RED footage like film, and you will have good results.

The RED is NOT a Video Camera: it does no onboard image processing.
The RED is NOT an HD Camera: it does not shoot 720/1080


What You Will Need
  • Final Cut Pro 7
  • Mac OS X 10.5 or Later (Leopard)
  • Disk Utility (comes with OS X)
  • RED RUSHES (available from http://red.com/support as part of the RED ALERT Install Package)
  • RED FINAL CUT PRO STUDIO 3 INSTALLER (available from http://red.com/support)


Glossary of Terms
  • "The Caboose Effect"
      • Plan from Front to Back.
      • Start With Distribution, then work your way through Acquisition
  • RAW
    • A File that contains minimally processed data.
    • Contains Pixel Data from an Image Sensor
    • Also Known as a Digital Negative
  • Online Editing
    • Handling the deliverable footage
    • The FINAL stage of editing
  • Offline Editing
    • Handling Transcoded versions of the RAW footage
    • NOT THE ORIGINAL FOOTAGE
  • Proxy
    • Footage that stands in the place of the ORIGINAL footage
  • Codec
    • "Compression-Decompression"
    • A set of instructions to Compress data for storage, and De-Compress for Playback
    • a specific algorithm for compressing or audio* 
  • Decompression
    • the process of restoring a video or audio file for playback from a compressed video, graphics, or audio file.
  • Compression
    • the process by which video, graphics, and audio files are reduced in size.** 
  • Color Space
    • a way to interpret numerical values for Color (RGB/CMYK/Etc)
    • A method of mathematically representing color for use with a specific display or medium.*
  • LUT
    • LookUp Table
    • a set of instructions used to profile color and gamma to simulate their appearance on a given mediom, such as an HD display, or a specific film stock.*
  • Gamma
    • Mathematical method for calibrating an image's brightness values for use with different displays*
  • Debayer
    • the mathematical process of interpreting RAW image data from a sensor back into a full-color image.*
    • DIRECTLY related to VISUAL QUALITY of your footage
    • the PROCESSING of your DIGITAL NEGATIVE
    • How it breaks down the Wavelet
    • Quality (Down Convert is Size)

  • Import
    • Bring Data INTO a program
  • Export
    • Send Data OUT OF a program (Create a NEW TYPE of file)
  • Transcode
    • Convert video or audio data from one codec, resolution, and/or format to another.*
  • Redspace
    • A custom gamma and color profile used for viewing RED footage


PROCEDURE FOR DL of RDM
In essence, your REDDRIVE is a film magazine; always handle it as such.  
Downloading the magazine is the most CRITICAL piece of working with the RED ONE; all of your footage exists in a SINGLE PLACE.  If anything happens to the footage, it is GONE FOREVER.  As a downloader on set, your job is to make copies of the data from the drive, and copy them safely to AS MANY PLACES AS POSSIBLE before returning the Red Digital Magazine for shooting.  THIS IS NOT A JOB FOR A PA!!  Make sure your Loader has previous RED experience, and is comfortable with the responsibility.  There are several tools available for DLing on set, with Disk Utility being one of the easiest.

Create Disk Images in Disk Utility

  • Mounting the RDM
    • CAREFULLY connect the RDM to the On-Set Laptop with a FW800 Cable.
      • The Red Drive will take a couple of seconds to mount;  this is normal
      • Never move the laptop OR the RDM while they are connected.
  • Launch Disk Utility
    • Applications => Utilities => Disk Utility
  • Select Your RED DRIVE
    • From the Panel on the Left Hand Side of the Window, Select Your Red Drive
      • HD Icon with "640.15 GD OEM" for a Device Name
      • Should have the name of your RDM for a Title
  • Create a New Disk Image
    • Click "New Image" icon at Top of Window
      • Save As: "RDM-[Day]-[MAG]" i.e. "RDM-7-D" or other naming convention
      • Where: [Project Folder] => "RED MEDIA" => [DAY]
      • Image Format: Read Only
      • Encryption: None
    • This will create a .DMG file in the directory you specified.
  • Visually Verify
    • In Finder, Check the File Size of your Red Drive
      • Select the Drive in the Left Hand Pane of the Finder window
      • CMD+I for the INFO window
      • Take Note of "USED" value
    • In Finder, Check the File Size of your .DMG
      • Select the .DMG in the Left Hand Pane of the Finder window
      • CMD+I for the INFO window
      • Take Note of USED value
    • If they are the same size, then you have successfully created a .DMG of your Red Drive.
      • Your .DMG may be SLIGHTLY larger than your drive; this is due to the way OS X Leopard computes file sizes.  This is Fine.  IF your .DMG is SMALLER than your Drive, then you have made a mistake, and should re-create the disk image.
  • Back-Up
    • Copy your .DMG to your On-Set Backup AS QUICKLY AS POSSIBLE.
    • Visually Verify that your .DMG's are the same size on both your Master and Backup Drives


THE ONLINE EDIT
(ONLINE RED Workflow For FCP 7 ONLY (updated 05.22.10)
  • Preparing Your Footage for Transcode
    • Using Your Camera Reports, Mark the RDC's that you want to Transcode in the RDM folders.
      • "Don't Print Bad Takes"
      • NEVER DELETE - You may need some of these files later.
      • DO NOT RENAME ANYTHING THAT THE CAMERA GENERATES
      • NEVER save or add ANYTHING to your original files:  Make a Backup, and LOCK IT.
      • You may have to Mount your .DMG files BEFORE they will be accessible in Finder/RedRushes.
  • Transcode in RedRushes
    • Step 1 - Add Clips
      • Add ONLY the RDC files you marked from your camera reports
    • Step 2 - The Render Tab
      • Debayer Quality: 1/2
      • Timecode: External/TOD
      • Look Source: Camera
      • Color Space: CameraRGB 
        • Will be editing Digitally/MOST LIKELY for Digital Distribution (For Digital Delivery)
      • Gamma Space: Redspace
        • VERY Close to the way you monitored on-set.
    • Step 3 - The Resize Tab
      • [Check] Scale
        • Preset: 1920x1080 (For HD Delivery)/2048x1080 for 2k Delivery (56 pixels on each side)
      • Fit/Stretch: Fit Width
    • Step 4 - The Output Tab
      • Output Format: Quicktime Movie
      • Quicktime Codec: Apple ProRes 422
      • OUTPUT FOLDER!!
        • Set to a New, SPECIAL folder on your Hardrive.
    • Step 5 - Click Start     
  • Import Into FCP
    • File -> Import File
  • Cut Your Film
  • Repeat as Necessary!


*From RED: The Ultimate Guide to Using the Revolutionary Camera by Noah Kadner
** From Apple Pro Training Series: Final Cut 7 by Diana Weynand


This file can be downloaded as a .PDF by clicking HERE.

LINKS:
RED SUPPORT PAGE
REDUSER.NET
RED: The Ultimate Guide to Using the Revolutionary Camera (Amazon)
Apple Pro Training Series: Final Cut Pro 7 (Amazon)

Mondo 2000: An Open-Source History


From Engadget:

Before there was a blogosphere, in those heady days of dial-up, how did one get culture? There were a few possibilities, all of which sound pretty pathetic in the modern era. If you had a friend in college, you could borrow their VMS account to access Usenet. Or, if you were lucky, maybe there was a 2600 meeting in your town. Then again there was always Walden Books at the Millcreek Mall -- if one of your visits happened to coincide with the erratic publishing schedule of Mondo 2000, you were in luck! From virtual reality to hacking, smart drugs, science fiction, and more: before ubiquitous broadband, and before Wired, this magazine was like a textbook from the future.

As far as we know, the whole story of this far-out publishing venture has yet to be told. That's why we're pleased as punch to hear that founding co-editor and all-around good guy R.U. Sirius is kickstarting a project called Mondo 2000: An Open Source History. The idea's pretty novel: everyone who was involved with the magazine is invited to collaborate on both a book and a website (including audio and video) that will trace the history of the magazine. And who knows? If things go well enough, some of the footage may be rolled into a documentary.


Wanna Contribute? Click HERE.

Have NO IDEA WHAT'S GOING ON?

http://en.wikipedia.org/wiki/R_u_sirius
http://en.wikipedia.org/wiki/Cyberpunk
http://en.wikipedia.org/wiki/Transhumanism
http://en.wikipedia.org/wiki/Mondo_2000


THE HISTORY SO FAR?

EPIC + Kenneth Willardt in NYC (From REDUSER)


Here's some Behind the Scenes Footage of a WORKING EPIC in NYC, from REDUSER.

CLICK HERE FOR QT GOODNESS!!

Minority Report UI designer demos his tech at TED (From ENGADGET)


From Engadget

Deus Ex: Human Revolution Trailer


Looks like 'Blade Runner: The Game'. . . this is gonna be AWESOME. Hopefully we'll get a Mac Port.